
Are you worried about spreading disease with the recorders?
Do you want a simple guide for parents and students to follow to clean the recorders?
Every year around mid-winter I’m always asked about how I clean recorders and what the students can do to make sure the reporters are clean.
This year I decided to make a guide on how to sanitize plastic recorders.
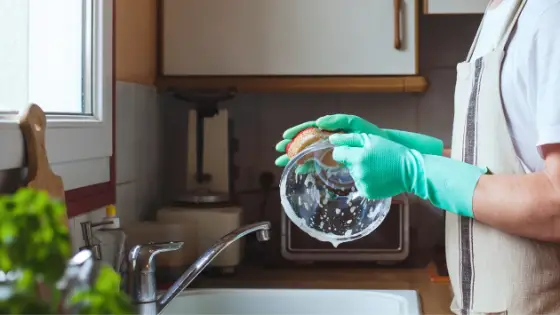
Sanitizing plastic recorders is actually quite easy. All you need is a sanitizing agent, warm water, and time to get it done. Basically, what you do is take the recorder apart, wash it in warm water with the agent, and let it dry.
For more details on what I like to use and how to do these steps effectively, read the rest of the article.
Table of Contents
What You’ll Need
Here is a list of things you’ll need to wash your recorder.
Some of these are optional, but make sure you read the descriptions to figure out if it’s something you need.
You may already have some of these items at home; if you do, you don’t need to buy brand new ones.
Some links are affiliate in nature which means I earn a small commission if you click and purchase the product. However, I never recommend products I don’t believe in.
Warm water – There are three basic methods to cleaning recorders I recommend, and they all include warm water.
Whether you’re using a sink or dishwasher, make sure the water is warm to hot. This will do a better job of killing germs.
Recorder cleaning cloth – The recorder cleaning cloth is going to help you wipe off smudges on the outside of the recorder as well as dry it when you’re done cleaning.
This is done with a towel or other microfiber cloth such as ones used on glasses or electronic devices.
Recorder cleaning rod – The recorder cleaning rod will be useful at the end for getting out any remaining moisture and debris inside the recorder body. Recorder cleaning rods are fairly cheap, but if you want to make your own, check out our guide on how to make your own cleaning rod.
Sanitizing agent – You need something to sanitize the recorder of germs.
If cleaning recorder by hand, the most common options are sanitizing sprays such as this one by Sterisol, or antibacterial dish soap like you would use with your dishes such as this Dawn dish soap.
The third option is the most hands off, and this is using the top rack of the dishwasher.
In this case, whatever dishwasher soap you use will do the job just fine.
Just make sure you place the recorder on the top rack of the dishwasher, so it doesn’t get too hot and potentially melt.
Washcloths – No fancy washcloths are needed for the sanitizing spray or dishwasher. If you’re washing by hand, make sure you’re using a gentle washcloth.
Scrubbing washcloths or sponges can scrape the plastic and cause visual damage to your recorder.
How To Clean Plastic Reporters: 3 Methods Step-by-step
In this section, I’ll briefly go over my three recommended methods for cleaning recorders step-by-step.
Any of these three will work just fine; it’s up to you what you have available and how much time you have.
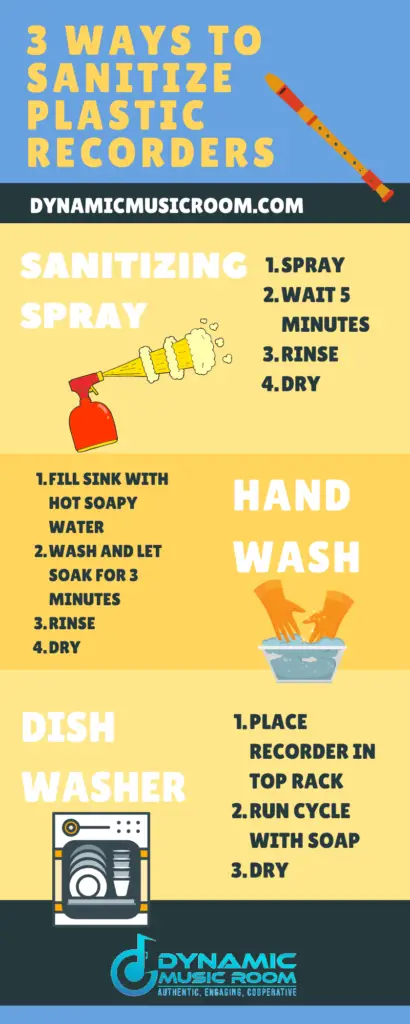
Method 1: Sanitizing Spray
Please note! Due to COVID-19 concerns, this method is now less preferred than the other 2 for safety reasons.
For the sanitizer method: you’ll need a special instrument sterilizer.
Take the recorder and apply a few sprays to the recorder making sure you get at least one good spray on the mouthpiece and windway.
Note: You may wish to take the recorder apart if possible, but this isn’t necessary.
Wait five minutes for this rain to dry.
Once the spray is dry, turn on your warm to hot water and rinse the recorder off.
Use the recorder cleaning cloth or microfiber cloth to dry off and wipe down the outside of the recorder.
Now take your recorder cleaning rod and thread fabric through the hole, wrapping the fabric around the length of the recorder in a circular fashion.
Stick the rod in the bottom of the recorder gently until it’s fully inserted. Now pull it out slowly while twisting the recorder rod to remove any debris from inside the recorder.
Your recorder is now clean and sanitized!
This is the method I preferred to use when sterilizing recorders at school. The cleaning rod step is skippable as it doesn’t add to the sterilization process.
Method 2: Hand Washing
This method takes more work, but it uses materials you probably already have available.
To begin, fill your sink up with hot water and one long squirt of dish soap.
Take the recorder or recorders and put it in the hot soapy water. Swish it around a little and then let it rest in there for 3 minutes.
Now take a gentle washcloth and wipe down the outside of the recorder. If your recorder comes apart, you may wish to take it apart and clean the joints where they meet.
Remove the recorder from the soapy water and rinse it thoroughly with fresh water.
Now take your cleaning cloth and wipe/dry the outside of the recorder.
Take your recorder cleaning rod insert the fabric through the hole and wrap it around the length of the recorder cleaning rod.
Insert the rod fully into the recorder and twist slowly on the way out to remove debris.
Reassemble the recorder and wait for it to fully dry. Your recorder is now clean and sanitized!
Note: After the recorders are removed, feel free to use the soapy water to wash your dishes.
Do not wash the dishes before you wash the recorder. This may result in chunks of food getting stuck inside the recorder mouthpiece.
Method 3: Dishwasher
The dishwasher method is the most hands-off method, but not everyone has a dishwasher. I also don’t have a dishwasher at school, so I don’t use this for cleaning.
For the dishwasher method, place the recorder on the top wet rack of the dishwasher and run the dishwasher through a cycle.
If possible, you want to turn down the temperature of the washer.
If washing the recorder while also washing dishes, make sure the dishes are well rinsed to decrease food splashing around and potentially getting in the right corner.
Once the cycle is done, take out the recorder and dry it off with the cleaning cloth.
Use your cleaning rod to insert a long piece of fabric into the recorder, and remove the rod by twisting slowly and pulling out.
Now wait for it to fully dry, and your recorder is clean and sanitized.
Communicating To Parents And Students
Every year around mid-winter I find it necessary to tell parents and students how to clean their recorders.
Every year, there are always people concerned about illness, and in this particular year, the worry is high.
We don’t want kids to be afraid of playing recorders and getting sick, so it’s our duty to get them educated on how to be safe.
This is exactly why I made this infographic to share with my families. Feel free to use it with your clientele as well.
Conclusion
I hope you find this guide on how to sanitize plastic recorders is helpful.
Keep in mind, this is only meant for plastic recorders. Doing these techniques with wooden recorders may result in damaging the wood of your recorder.
Following the steps will kill 99.9% of germs.
UPDATE: This hasn’t been tested in regards to COVID-19.
For tons of recorder sheet music at great prices check out Sheet Music Plus. They have 40% of all music in their bargain bin (and a good chunk of it at the time of this writing is recorder music for all levels!).